Tutorial 1. Sensor Calibration


#1

Hi, here is a description about how to calibrate the angle sensors.

Step 1. Disassemble the two angle sensors form the robot arm. Loosen the screws and take it out of the slot, but keep it connected with the cable.

Step 2. Turn on the power, and put the two sensors on a table, as horizontal as possible.

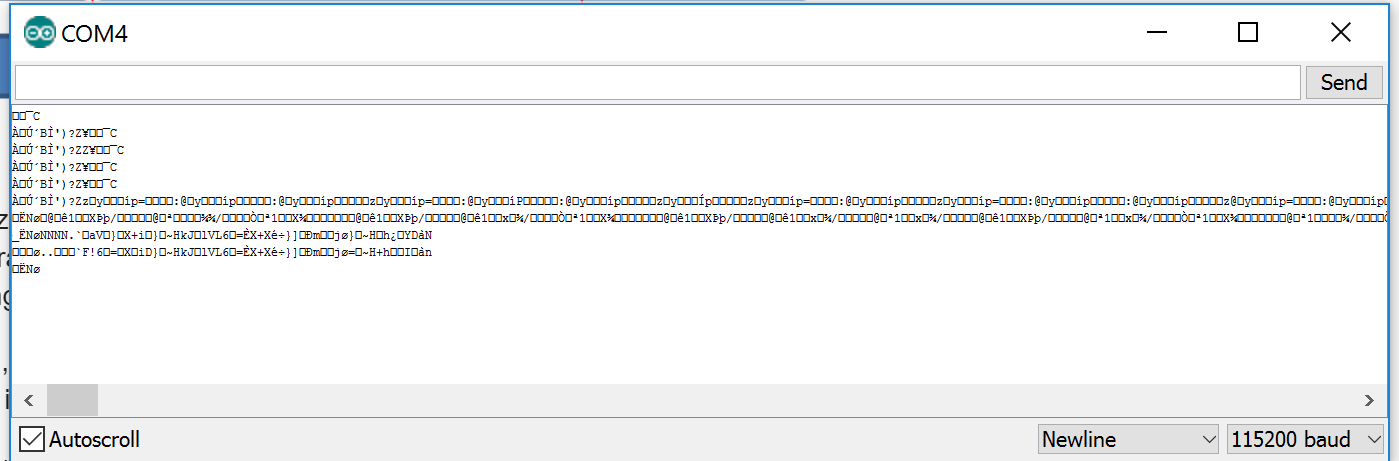
Step 3. Find a “COM Bug assistant”, or just the COM tools in the Arduino. Set the BAUD rate as 256000(which is currently used), open the port, and you may see some random data like this:

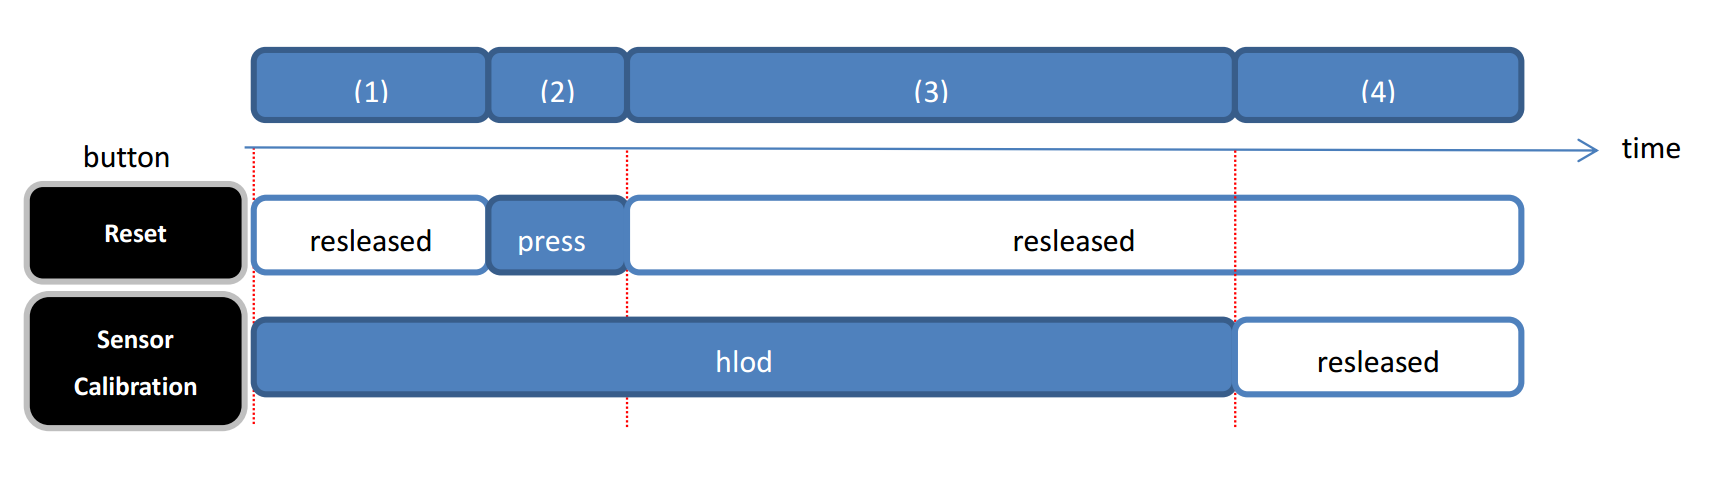
Step 4. Operate like this to enter the calibration mode:
1)start
2)Reset once
3)hold Sensor Calibration for MORE than 2 second after Reset
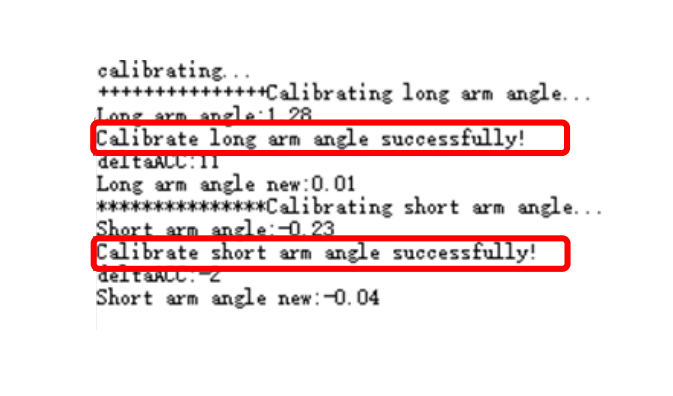
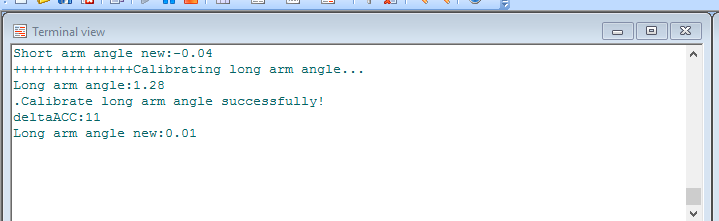
4) release the Sensor Calibration to enter the calibration mode, you will now read “Start calibrating…” at the COM tool’s window

Step 5. Put the two angle as horizontal as possible, and then press the Sensor Calibration to calibrate the sensor. Two sensors will be calibrated one by one.
So press once to calibrate the long arm(rear arm), press again to calibrate the short arm(forearm).

  • If the calibration is successful, you will read “Calibrate long/short arm angle successfully!”, then calibrated data will be written into the Arduino. And you can just reset and the calibration is finished.

  • If the sensor is not in a horizontal place, the calibration will be failed, you will read “** failed, need to be re-calibrated !!!**”, . And you can repeat Step 5 until both two sensors are successfully calibrated.

note:
1. after reset or power off, the calibration information won’t lost. It is written to the eeprom and used next time.
2. if you are going to use a different firmware, lets say, you may late use a new firmware with a baud rate 9600, then in Step 3, the baud rate should be changed to 9600 as well.

Feel free to make comments if you have any question. :slight_smile:


No proper Calibration of the Dobot
#2

Notification about successful calibration:


#3

When i monitor all i get is this http://imgur.com/IIvh3nl

Please help , my arm dosent work and you do not respond to my mails


#4

You are supposed to get that until you do what is described in Step 4 above, which stops reporting current dobot state and switches dobot to calibration mode.


#5

can you please explain step 3 a bit more? Should I use the native arduino application for this? I can not set 256000 BAUD rate. Thanks for the help.


#6

currently I’m getting this. I cannot set 256000 BAUD rate. What Arduino board should I select exactly?


#7

Im having the same problem


#8

Have you tried Step 4?
I don’t think the baud rate matters when you are using the usb driver (which is just a virtual serial port). It sure doesn’t under *nix (Linux, MacOS).
So ignore the gibberish you get in the console and go straight to Step 4.

I think that gibberish is what was meant by

in Step3, but the image of that random data was never added to the post.


#9

At step 4 its still gibberish :confused:


#10

Hi, just noticed this problem. can you try to find another COM debug tools for this? or if anyone here have some recommended one? I think there are a lot this kind of tools.


#11

here is the image of step 3, cause the ‘new user’ issue, only one image is allowed. :sweat_smile:


#12

BAUD RATE is the KEY!

25600 is important. I did not notice that there are no 256000 in the Serial Monitor of arduino.
Is there someone recommend a new tools??
Or I can ask our enginner make a simple one and upload it later.


#13

Thankyou i used this http://www.eltima.com/products/serial-port-monitor/ it works now


#14

Thanks a lot for giving out the link.
We also made a simple one yesterday, it will be uploaded tomorrow. along with other things.


#15

#16